GuitarFretBoards.com
Your Subtitle text
4 Speaker 8 Ohm Wiring Diagram
Speaker replacement tip:
When wiring any speaker cabinet, please make sure that the wire terminal connectors are not loose. If you are soldering them you do not want a cold solder joint. If you are using slip on/crimp solderless paddle connectors, make sure the connection is tight which may require sqeezing them with a pair of pliers to make them tight.
What gauge speaker wire to use:
I recomend using at least 16 gauge speaker wire on most everything. For wiring guitar amps, I like to use 12 gauge speaker wire but 14 or 16 will still do fine. Note: The smaller the gauge number, the THICKER the wire is. So, a 12 gauge wire is thicker than a 14 gauge wire.
How to use a multi-meter to check speaker ohms.
Also, when using a voltage meter to determine if the ohms are correct, the reading on the meter will usually be slightly under what you want. For example, an 8 ohm wiring may only read 6.8 ohm, or a 16 ohm wiring may only read 12.9ohm. This is perfectly normal and is what you want.
How to test the speaker phase:
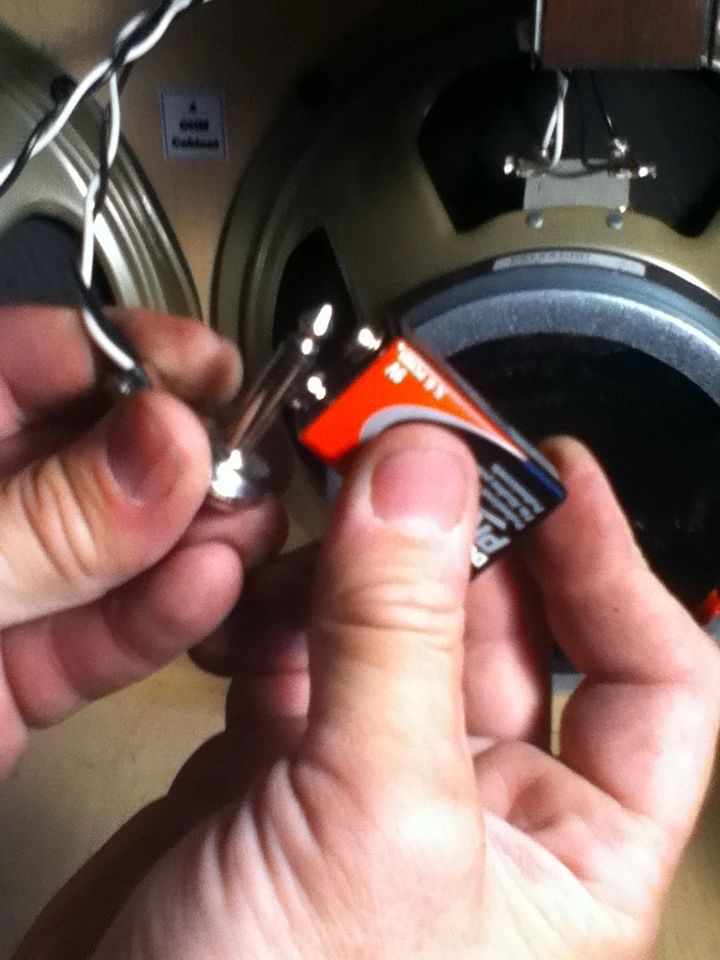
To test the phase of the wiring, a little trick that I use is to take a 9 volt battery and touch the negative (-) side of the battery to the negative speaker wire. Then, while watching the speaker cone, touch and release the positive side of the battery(+) to the positive speaker wire. This will make a loud popping sound from the speaker and the speaker cone should push out(away from the voice coil) when the battery touches, then back again when the battery releases from the wire. If the speaker is wired INCORRECTLY, then the speaker cone will pull back insead of pushing out when you touch the positive side of the battery to the positive side of the speaker wire. If this happens, you dont have to rewire the whole cabinet, just flip the 2 wires that are attatched to the speaker jack. Also, once the jack is in place, I like to plug in a speaker cable and touch the battery again to the end of the speaker wire to verify the whole thing is in the correct phase.
When wiring any speaker cabinet, please make sure that the wire terminal connectors are not loose. If you are soldering them you do not want a cold solder joint. If you are using slip on/crimp solderless paddle connectors, make sure the connection is tight which may require sqeezing them with a pair of pliers to make them tight.
What gauge speaker wire to use:
I recomend using at least 16 gauge speaker wire on most everything. For wiring guitar amps, I like to use 12 gauge speaker wire but 14 or 16 will still do fine. Note: The smaller the gauge number, the THICKER the wire is. So, a 12 gauge wire is thicker than a 14 gauge wire.
How to use a multi-meter to check speaker ohms.
Also, when using a voltage meter to determine if the ohms are correct, the reading on the meter will usually be slightly under what you want. For example, an 8 ohm wiring may only read 6.8 ohm, or a 16 ohm wiring may only read 12.9ohm. This is perfectly normal and is what you want.

How to test the speaker phase:
To test the phase of the wiring, a little trick that I use is to take a 9 volt battery and touch the negative (-) side of the battery to the negative speaker wire. Then, while watching the speaker cone, touch and release the positive side of the battery(+) to the positive speaker wire. This will make a loud popping sound from the speaker and the speaker cone should push out(away from the voice coil) when the battery touches, then back again when the battery releases from the wire. If the speaker is wired INCORRECTLY, then the speaker cone will pull back insead of pushing out when you touch the positive side of the battery to the positive side of the speaker wire. If this happens, you dont have to rewire the whole cabinet, just flip the 2 wires that are attatched to the speaker jack. Also, once the jack is in place, I like to plug in a speaker cable and touch the battery again to the end of the speaker wire to verify the whole thing is in the correct phase.

